How to Add Custom Fields and Tabs into WooCommerce Product Data Metabox

WooCommerce is one of the most popular WordPress plugins.
In this post, I’ll try to teach you what WooCommerce product data are and how to add your custom meta fields into WooCommerce’s Product data metabox by code. So we’ll go into detail about how to add your custom fields, where to add them, how to save them, and finally how to display them in your theme.
First of all: what are WooCommerce product data?
Navigate to your WooCommerce products and edit one of it.
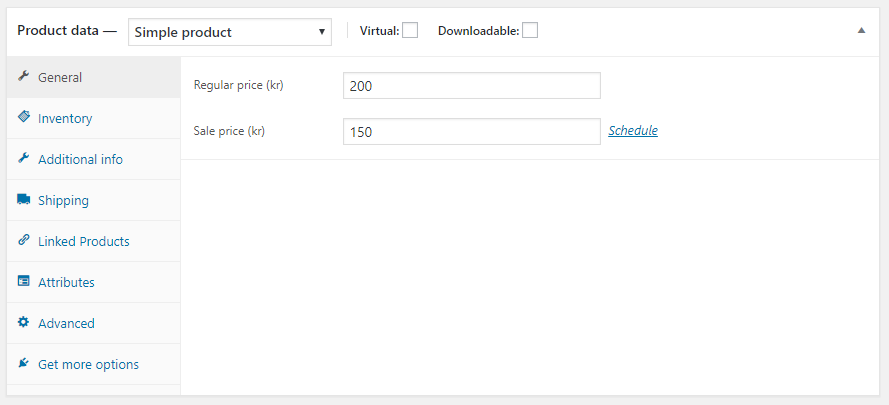
First of all, take a look at the existing panels:

As you notice the tabs have different visibility depending on the product type.
For example, “General” tab gets removed when you switch to a grouped product type. So not only should you consider where your custom fields logically fits in, but you need to consider a panel that is visible for all your desired product types.
Adding new product data tabs
WooCommerce introduced tons of custom hooks.
Here is the official documentation.
In order to add a new product data tab, we use woocommerce_product_data_tabs hook.
Let’s pretend we want to add a new data tab called Gift:
<?php
/**
 * Add a custom product tab.
 */
function custom_product_tabs( $tabs) {

	$tabs['giftcard'] = array(
		'label'		=> __( 'Gift Card', 'woocommerce' ),
		'target'	=> 'giftcard_options',
                'priority'	=> 45,
		'class'		=> array( 'show_if_simple', 'show_if_variable'  ),
	);

	return $tabs;

}
add_filter( 'woocommerce_product_data_tabs', 'custom_product_tabs' );
This function adds new elements to the registered tabs array (stored in the $tabs variable).
You can pass to the function four parameters:
label– The UI labeltarget– used by UIpriority– an integer used to sort tabsclass– this defines the tab visibility
After registering the product data you can assign an icon using the admin_head hook.
Use this code:
<?php
/**
 * Add a bit of style.
 */
function wcpp_custom_style() {

	?><style>
		#woocommerce-product-data ul.wc-tabs li.giftcard_options a:before { font-family: WooCommerce; content: '\e600'; }
	</style><?php

}
add_action( 'admin_head', 'wcpp_custom_style' );
Notice that the li.giftcard_options identifies the correct product tab and it will add the correct icon.
Adding fields to product data tabs
Ok, now it’s time to add some fields to the new data tabs. For this we use woocommerce_product_data_panels hook:
<?php

function add_product_data_fields() {
    ?>
    <div id="gitfcard_options" class="panel woocommerce_options_panel">
       <?php
       woocommerce_wp_text_input( [
          'id' => 'code',
          'name' => 'Gift code',
          'value' => '123',
          'label' => __('code', 'woocommerce'),
          'description' => __('a brief description', 'woocommerce'),
          'desc_tip' => true,
        ] );
        ?>
    </div>
    <?php
}

add_filter( 'woocommerce_product_data_panels', 'add_product_data_fields' );
Here we add a text field using a built-in WooCommerce function. This function takes some parameters:
id– the field idname– the field namevalue– the default valuelabel– the UI labeldescription– a field descriptiondesc_tip– specify if display the description in a tooltip
Here you can find the full list of functions you can use.
To the next part: saving data.
<?php

function product_data_save($post_id) {
    $product = wc_get_product( $post_id );
    $fieldValue = isset($_POST['giftcard_code']) && !empty($_POST['giftcard_code']) ? sanitize_text_field($_POST['giftcard_code']) : '';
    $product->update_meta_data('_giftcard_code', $fieldValue );
    $product->save();
}

add_filter( 'woocommerce_product_data_panels', 'product_data_save' );
Now the last part: display the data tabs on your theme.
<?php

function show_gift_card_tabs() {
    $tabs = [];

    $tabs['gift_card_tab'] = array(
        'title' 	=> __( 'Code', 'woocommerce' ),
        'priority' 	=> 50,
        'callback' 	=> 'display_gift_card_tab'
    );

    return $tabs;
}

function display_gift_card_tab($activeTab) {
    if($activeTab === 'gift_card_tab'){
         $value = metadata_exists( 'post', $post->ID, '_giftcard_code' ) ? get_post_meta( $post->ID, '_giftcard_code', true ) : '';
         ?>
         <h2>Gift Card</h2>
         <p>Code: <?php echo $value; ?></p>
         <?php
    }
}

add_filter('woocommerce_product_tabs', 'show_gift_card_tabs');
Use ACPT to add custom fields and product data to WooCommerce products
Good news…ACPT allows you to save time to create your WooCommerce product data!
The process is really straightforward.
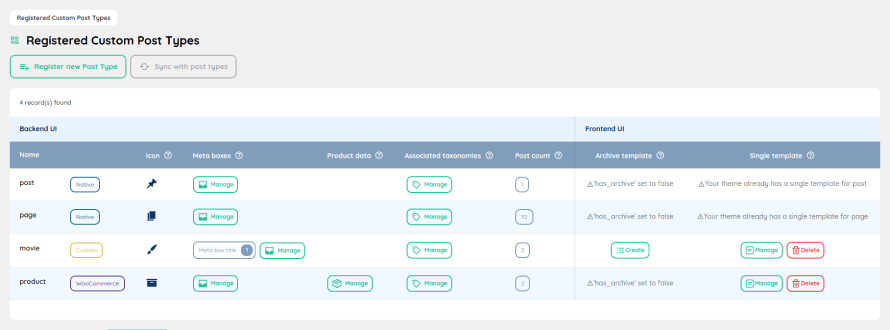
If you don’t have already installed WooCommerce do it. Then you’ll see something like this:

Wow, ACPT is capable to recognize WooCommerce post types! Did you notice an extra field in the CTP list table?
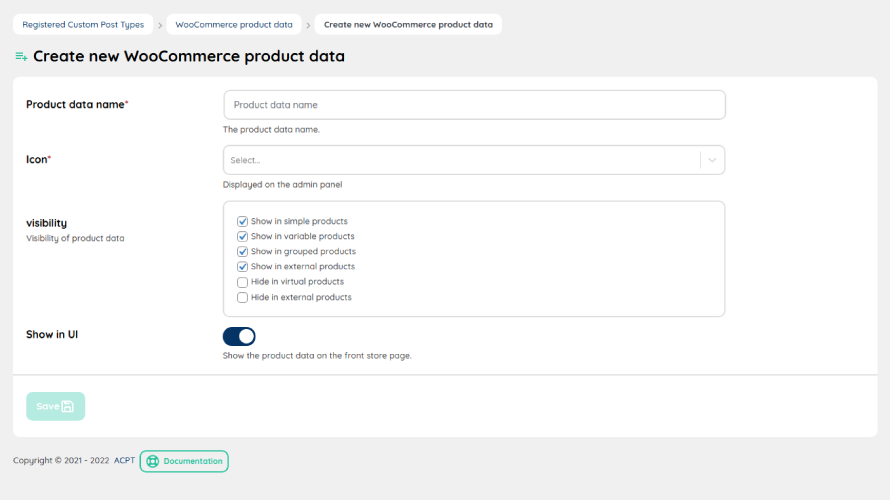
Ok enter in the product data list and try to add the first product data metabox:

There are only four fields:
- the name
- the icon
- the visibility
- if the tabs has to be showed in UI
The icons are directly taken from the official WooCommerce iconset.
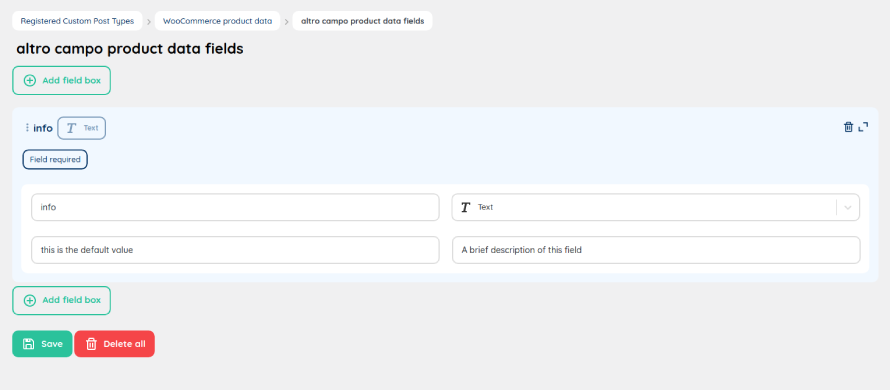
Once the product data is created you can add to it as many fields as you want.
And again…the product data fields UI has a well-known look, isn’t it?

You can choose one of the standard WooCommerce metabox field types:
- Text
- Textarea
- Select
- Radio
- Checkbox
Set up your fields as usual and…TADAA 🎉. You are done!
Comments
There are no comments yet